blackjack
Well-Known Member
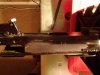
Rick,
After tiging heat the holes area to bright blue. The oven was only an option if the barrel was un-screwed. Good luck with the tig welding, and make sure that the outside & inside of the holes are polished bright, you don't want to let the tig come in contact with any blacking of the receiver! You have done the right thing in machining out the threads.
Blackjack